
 |
| Materials: Banner Punch (133519), Garden Gingham DSP (129310), Garden Gingham Washi (129314), Elegant Butterfly punch (127526), Sassy Salutaitions stamp set (132070), Daffodil Delight cardstock (121680), Whisper White cardstock (106549), Melon Mambo cardstock (119980), Daffodil Delight ink (126944). |
 |
| Materials: Banner Punch (133519), Garden Gingham DSP (129310), Kaleidoscope DSP (132995), Garden Gingham Washi (129314), Epic Day Washi (131269), Bitty Butterfly punch (129406), Sassy Salutaitions stamp set (132070), Sweet Essentials stamp set (132085), Daffodil Delight cardstock (121680), Whisper White cardstock (106549), Melon Mambo cardstock (119980), Basic Black cardstock (121688), Brights Buttons (130028), Rhinestone Jewels (119246), Whisper White Twine (124262), Daffodil Delight ink (126944), Island Indigo ink (126986), Staz On ink (101406). |
If you would like to order any of these products, please contact me here, or you can order online at anytime here.
Step by Step:
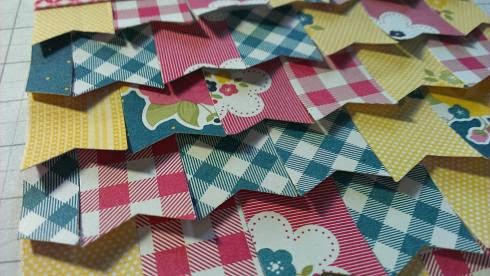
Step 1. Punch out a heap of banners from your leftovers. This is a great job to do whilst sitting in front of the tv catching up on some tv shows.

Step 2: You can choose to add the banners direct to the card base, or create a mat to adhere them to. Starting at the base of the card, use some glue or tape to adhere the bottom row of banners to the card. You can randomly add the pieces or make a pattern.


Step 4: Cover the top of your last row with washi, ribbon, twine or a strip of paper. (If you are using ribbon or twine, do step 5 first).

Step 5: Turn over your card and trim off the bits hanging over the edge.

Step 6: Make sure to "fluff"up the banner pieces to give some texture to the card.

Step 8: If you create a mat for your banner, adhere this to your base.
I hope you will give this card a try and make yourself feel good about using up all those little pieces! Make sure to share your creations on my facebook page (search for Scrap and Stamp with Ronnie)!
No comments:
Post a Comment